
Note: The workflow below assumes you have generated content and your source files have finished processing in the Data Room. Open your document in Editing mode to use Refinement. If you need help getting started, see How to use the Refinement Tool.
Understand what a context window means
Think of a context window as the AI's working space for one request. It holds the information available for that task, such as instructions, source passages, and existing draft content.
Your Data Room is the library. The context window is the material on the desk for the task at hand. Storing a document in the library does not mean the AI reads the whole document every time.
Context capacity is measured in tokens, which are small pieces of text. There is no dependable conversion from tokens to a fixed number of pages or files. A dense table and a page of short paragraphs can take up very different amounts of space.
When there is too much source material, some content may be shortened or selected through retrieval rather than included in full. Even when material fits, the AI can still overlook details.
Context limits are not upload limits
Upload limits determine whether a file can be added and processed. Context limits concern the information used for an AI request.
A successful upload does not guarantee that every page will be used in a generation. Splitting a file also does not increase the context window if you select all the resulting pieces together.
Tip: Missing information is not always a context problem. Check whether the right file was selected, its content was extracted correctly, and your instruction names what you need.
You do not need to calculate a token budget to improve a draft. Start by checking the source scope, then prioritize the evidence that matters.
Manage context when refining a draft
1. Open the Refinement panel
Click the star icon in the Document Editor's right-hand panel.
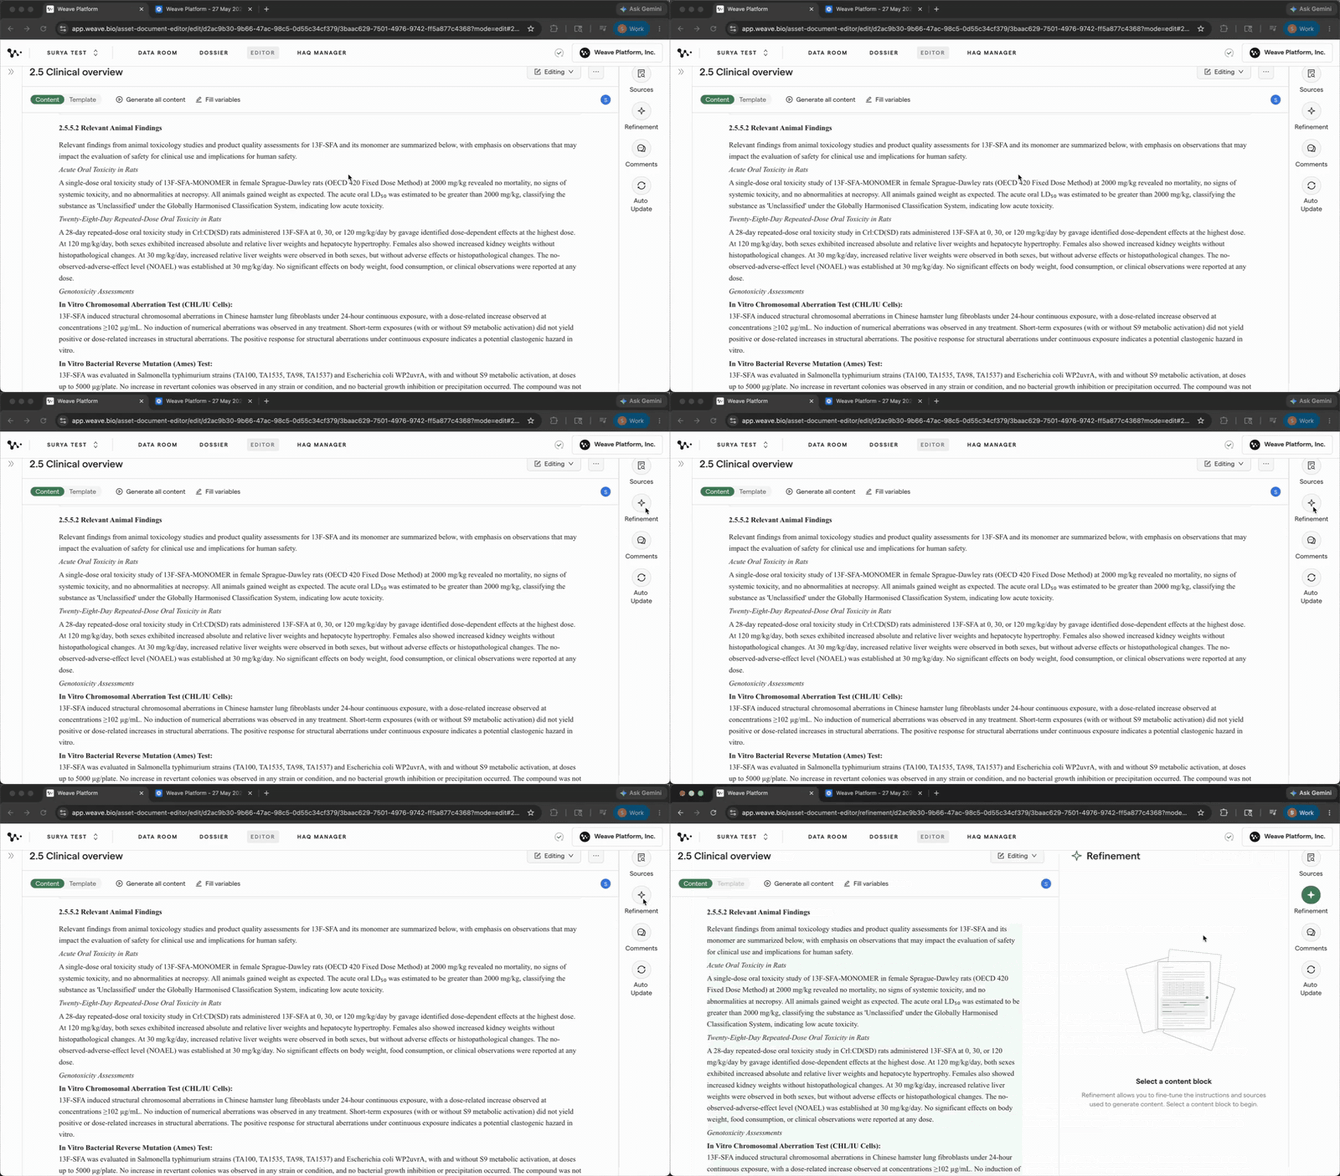
Opening Refinement beside your draft
2. Select the content you want to improve
Select the passage or block that is missing information.
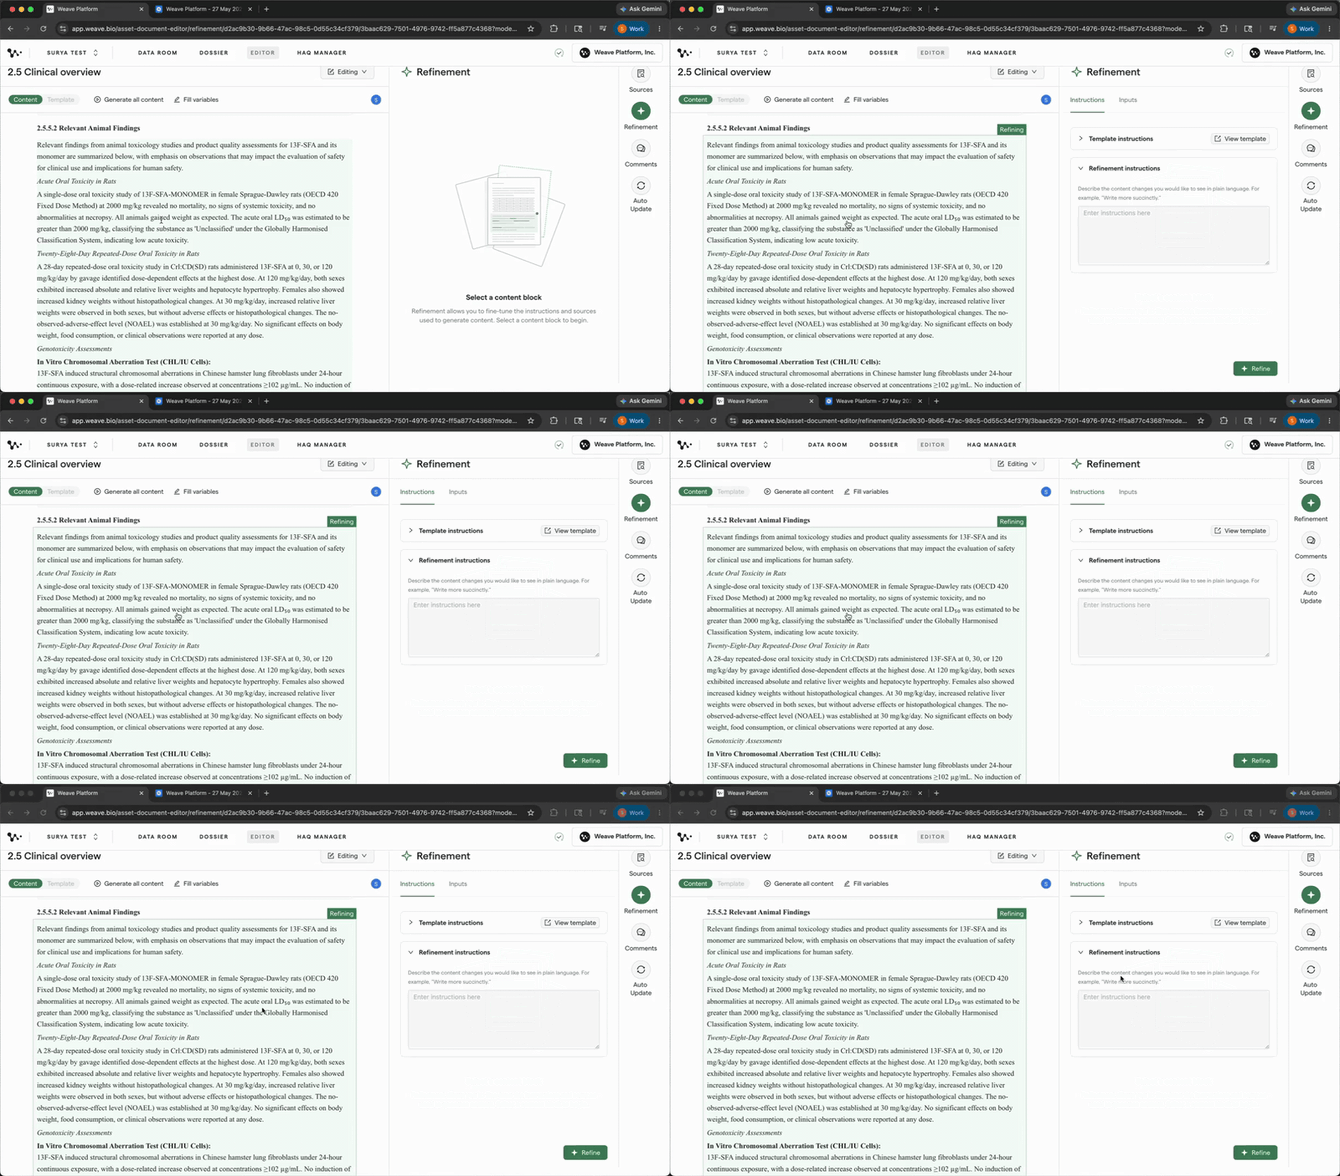
Choosing the content to refine
Keep the task focused. For a large overview table, identify the missing study or group of studies before asking for another pass.
3. Review the source files
Click Inputs in the Refinement panel to review the selected source files. Use + Files if you need to add a missing source.

Checking which source files are available for the refinement
Confirm that the file containing the missing information is selected. Keep the files needed to support the task and remove unrelated ones.
Note: These file controls apply to blocks using source files. A block that draws from other dossier sections may not offer the same controls.
4. Check for the Partial document use notice
Look below the file list in Inputs for the Partial document use notice.

The Partial document use notice and keyword controls in Refinement Inputs
The notice says “The context window is full.” It explains that, by default, refinement will use only the beginning portions of each file. Information later in a file, such as an appendix or a detailed results table, may not be included.
This does not mean your upload failed. It means the selected source material cannot all be used at once in this refinement.
Tip: When this notice appears, use Enter keywords here to prioritize relevant source content, then click Preview keyword changes. The next steps explain how to separate your writing instruction from those keywords and check the evidence before refining.
5. Write the change you want
Open the Instructions tab and enter a specific refinement instruction that explains what to add, change, and preserve.
For example:
"serious adverse events [study ID] Add the serious adverse event findings for study [study id]. Preserve the supported rows and units. If a value is not available in the sources indentify it as a missing rather than inventing it"
Replace the bracketed text with your study identifier. Put output requirements and conditional directions in this instruction, not in the prioritization terms.
6. Prioritize relevant source content
Return to Inputs and enter distinctive source terms in Enter keywords here, beneath the Partial document use notice.
For the example above, use terms such as:
serious adverse events [study ID]
Use the wording in your source documents. Include an abbreviation and its full term when the sources use both.
| Use prioritization terms for | Use the refinement instruction for |
|---|---|
| Study identifiers and endpoint names | What the draft should add or change |
| Distinctive words from the source | What existing content to preserve |
| Relevant section-title text | Output structure and handling missing values |
Important: Prioritization is not an exclusion filter. Terms such as
NOT clinicaldo not reliably remove clinical content. Remove unwanted files through source selection instead.
With the source scope and terms in place, check the evidence before reviewing the new draft.
Check the evidence and refine in smaller passes
7. Preview the prioritized content
Click Preview keyword changes after entering your keywords. Inspect the returned page ranges in the source document, where available.
Look for the actual study, endpoint, or table you need. If it is missing, revise the terms or source selection before continuing.
Page-range feedback is available for PDF and DOCX in the documented workflow. Other formats may not provide the same preview.
Note: Typing “use pages 100–150” in the prioritization field does not enforce a page-range filter. You can give page-specific directions in the refinement instruction, but you still need to check that the relevant content is available.
8. Run the refinement
Click Refine to produce a proposed update.
Weave uses your draft and the selected source context to propose a change. A completed result is not a guarantee that every relevant fact was found.
9. Review the proposed changes
Compare the proposal with the source evidence before choosing Accept or Reject.
For a study table, compare the rows against your expected study list. Check identifiers, units, time points, values, and supporting references.
If the result is incomplete, reject it and adjust the instruction, files, or terms before trying again.
10. Continue with another focused pass
Update the source selection or instruction for the next missing part of the draft.
You can build a long section or table incrementally instead of asking for every source and every change at once. Review what each pass preserves as well as what it adds.
Tip: Removing a source file does not automatically remove statements already in your draft. If content needs to be deleted or corrected, request that change explicitly and check the result.
Once the required evidence is covered, complete your usual scientific and regulatory review.
If information is still missingIf you see Partial document use, follow the keyword-prioritization and preview steps above. The notice identifies a context-capacity issue for that refinement, but missing information can have other causes too.
Whether or not the notice appears:
- Check that the expected file has finished processing.
- Open the source and confirm that Weave can read the relevant text or table.
- Verify that you selected the right study and document version.
- Make the task smaller and name the missing information explicitly.
- Check the actual source content rather than relying only on the presence of a file in the source list.
For initial generation, review the AI block's source files or data tags. See How to Use Source Files for the selection workflow. Make template changes when you want to change the starting source configuration for future generation.
For Data Room Ask, narrow the question to a study, endpoint, or topic. Automatic source discovery does not mean Ask reads every file. See How to ask questions about your Data Room sources in Weave.
If you repeatedly receive an input-length error or cannot recover missing evidence, contact your Weave support team. Include the affected document and section, your instruction, the expected source file and page, and the exact error. Use your approved support channel for sensitive material.
These details help distinguish a context issue from a source-selection, extraction, or prompting problem.
FAQ
Q: What is a “context window” and why are there file size limits?
A: A context window is the information the AI can work with in one request. File-size limits govern upload and processing, so they are separate constraints. A file can upload successfully without every page being included in a particular AI request.
Quick Reference: Manage source context
- Open Refinement in Editing mode.
- Select the passage or block you want to improve.
- Open Inputs and check the selected files.
- Look for Partial document use, which says the context window is full.
- Write your change request in Instructions.
- In Inputs, add relevant terms under Enter keywords here.
- Click Preview keyword changes and check the returned evidence.
- Click Refine.
- Verify the proposal before accepting or rejecting it.
- Repeat with a focused task, or contact support if the problem persists.