
Note: This guide assumes your program has already been created. If you haven't set one up yet, reach out to your Admin or Customer Success contact.
What is the Data Room?
The Data Room is the source file library for a Weave program. Every document you want the AI to reference during content generation gets uploaded here. This includes clinical study reports, manufacturing records, investigator brochures, and prior submissions.
Important: If a source document is not in the Data Room, the AI will not use it. If you see "Not specified" in generated content, the most common reason is that the relevant source file is missing or not yet tagged correctly.
Step 1: Open the Data Room
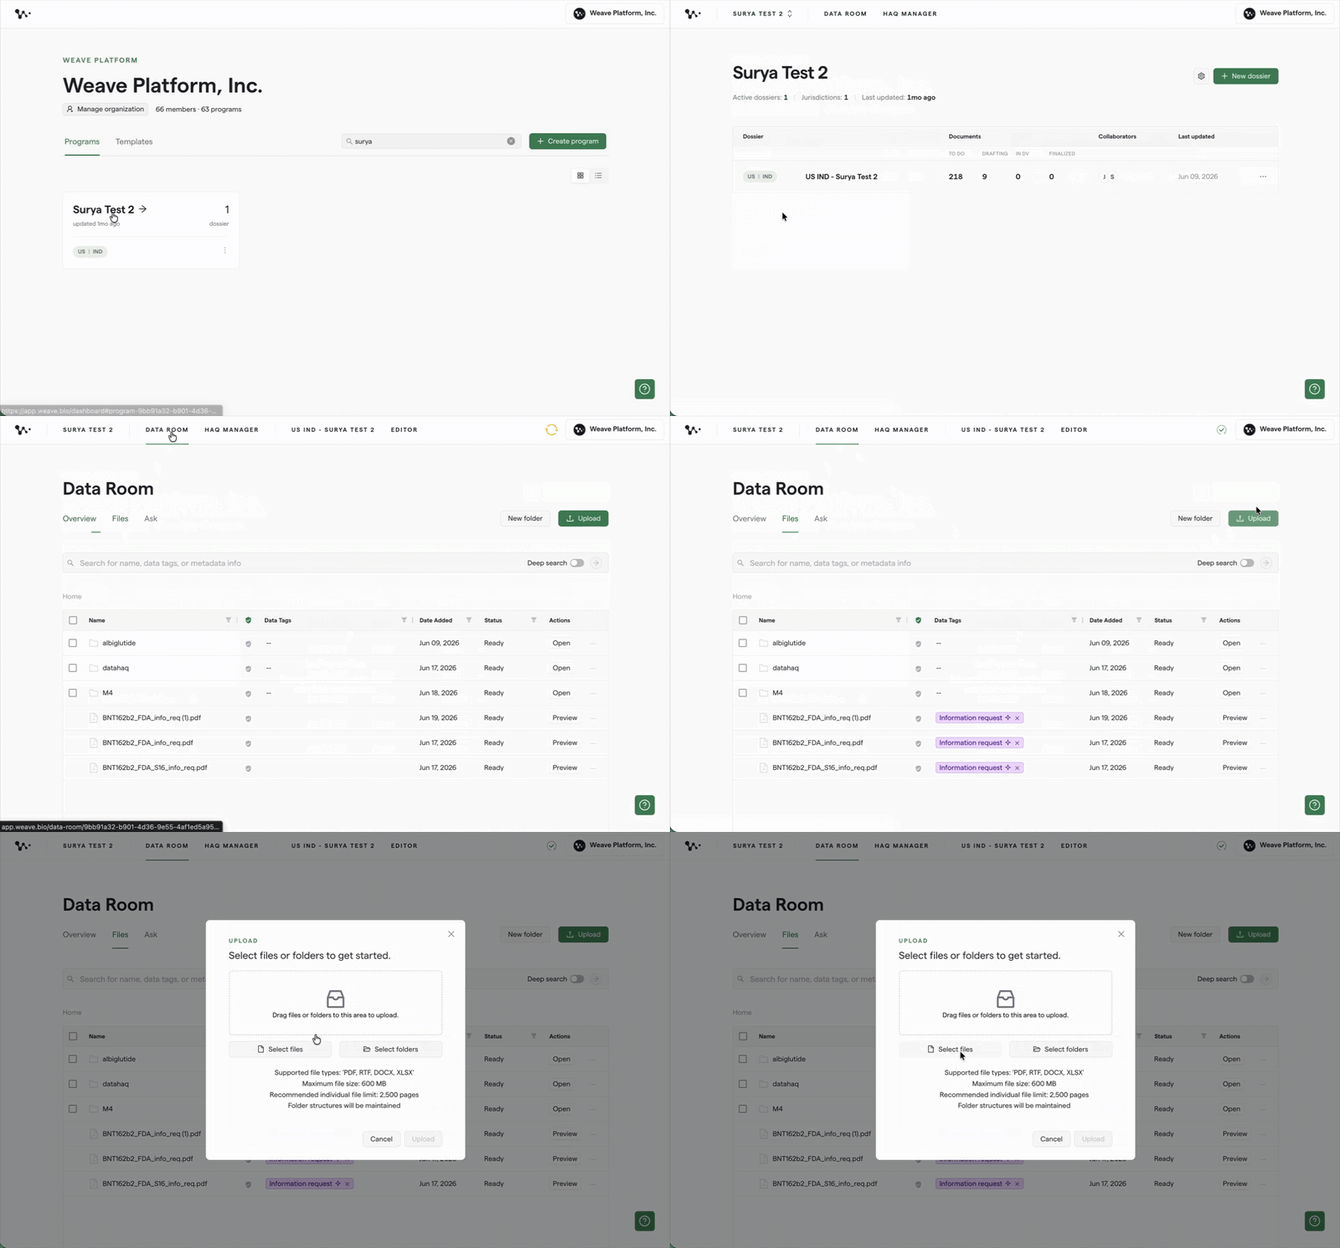
Navigate to your program from the homepage, then click Data Room in the left-hand navigation.
Step 2: Upload your files
Click the Upload button in the top right corner of the Data Room. From here you can upload individual files, entire folders, or folders with nested subfolders.
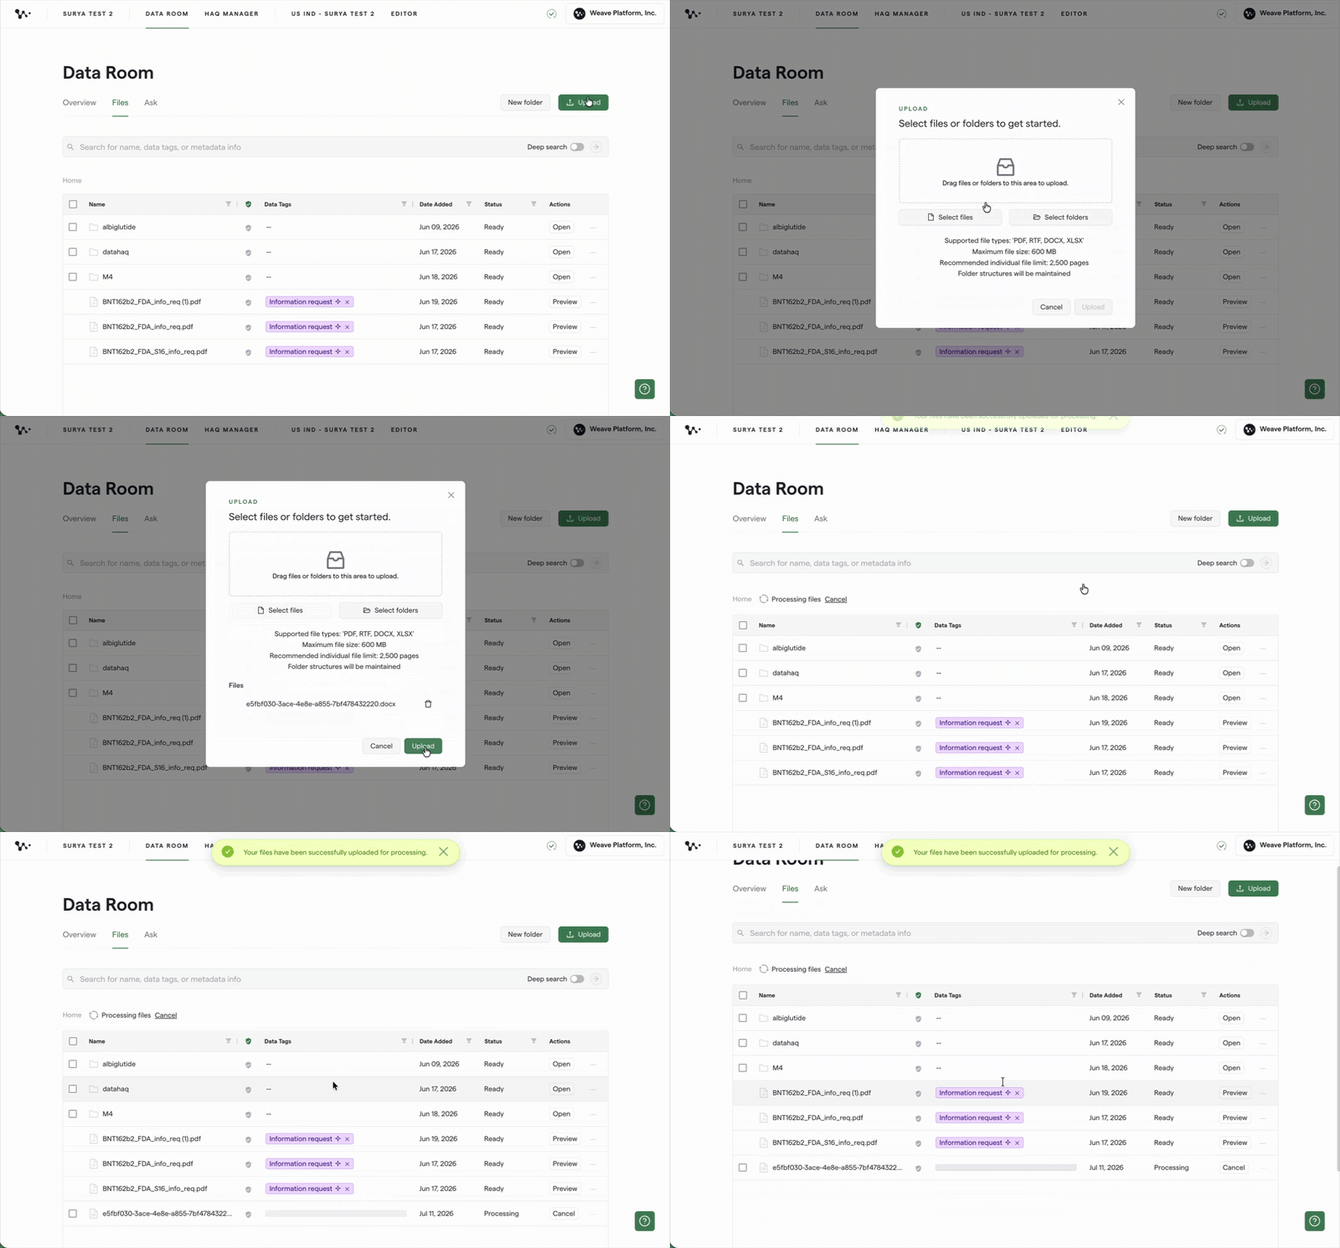
Tip: When you upload a folder, Weave automatically preserves your existing folder structure. You don't need to recreate it manually. The platform keeps your files organized exactly the way your team already works.
Supported file types: PDF (digital or scanned), DOCX, RTF, and Excel. Maximum file size is 600 MB per file.
Note: PowerPoint files are not directly supported. Convert any decks to PDF before uploading.
Note: Password-protected files will fail to upload without a clear error message explaining why. If a file repeatedly fails while others succeed, check whether it's password-protected or internally encrypted. Files with corruption or encryption also fail to process.
Note: Occasionally a file fails to process during upload. When this happens, the platform often creates a "repaired" version of the same file that uploads successfully. If you see both a failed version and a repaired version of the same file in the Data Room, delete the failed duplicate. Leaving both in place can cause confusion and interfere with source matching.
Step 3: Preview a file
To confirm a file has been processed correctly, click on any file in the Data Room and select Preview.
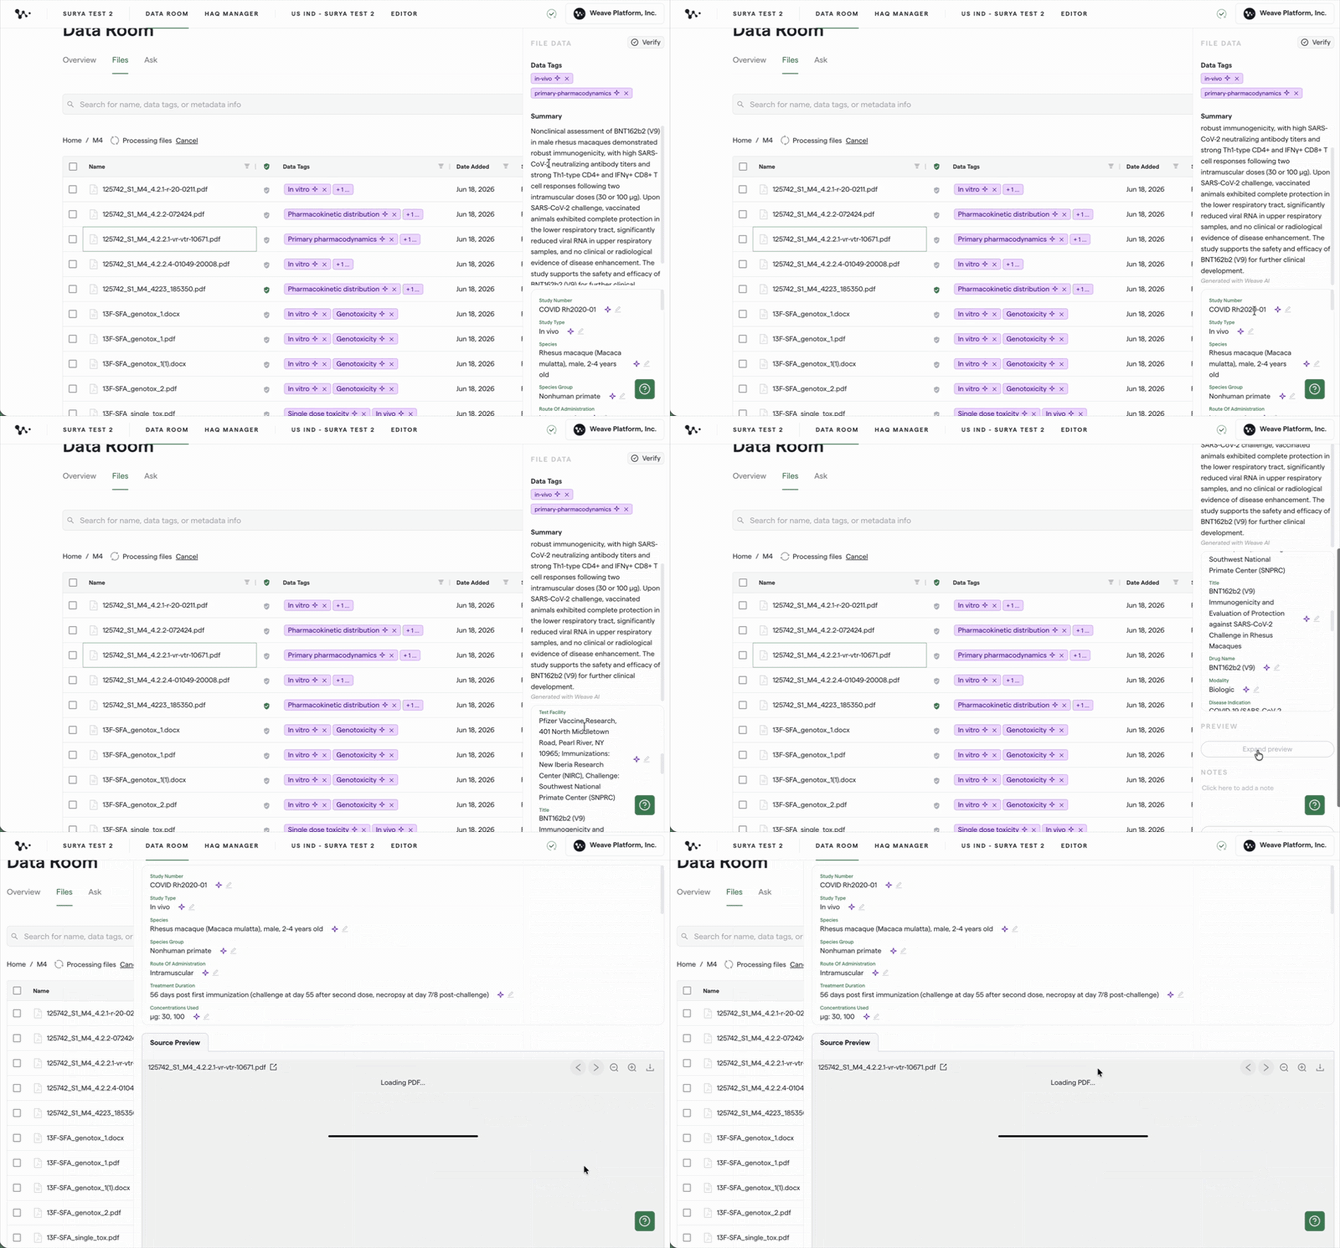
The preview shows:
- A document summary
- Relevant metadata extracted from the file
- An Expand Preview option to view the full document
Tip: For RTF-format files especially, check the preview to confirm the AI has extracted the content correctly. You can also click the three dots on any file, then View Extracted > Show Raw Markdown to see the exact text the AI is working from. This is the primary diagnostic when a file's content isn't being pulled into generated sections as expected.
Step 4: Review the Overview section
The Overview section in the Data Room gives you a high-level summary of all studies and documents across the program. Click Overview in the top navigation of the Data Room to access it.
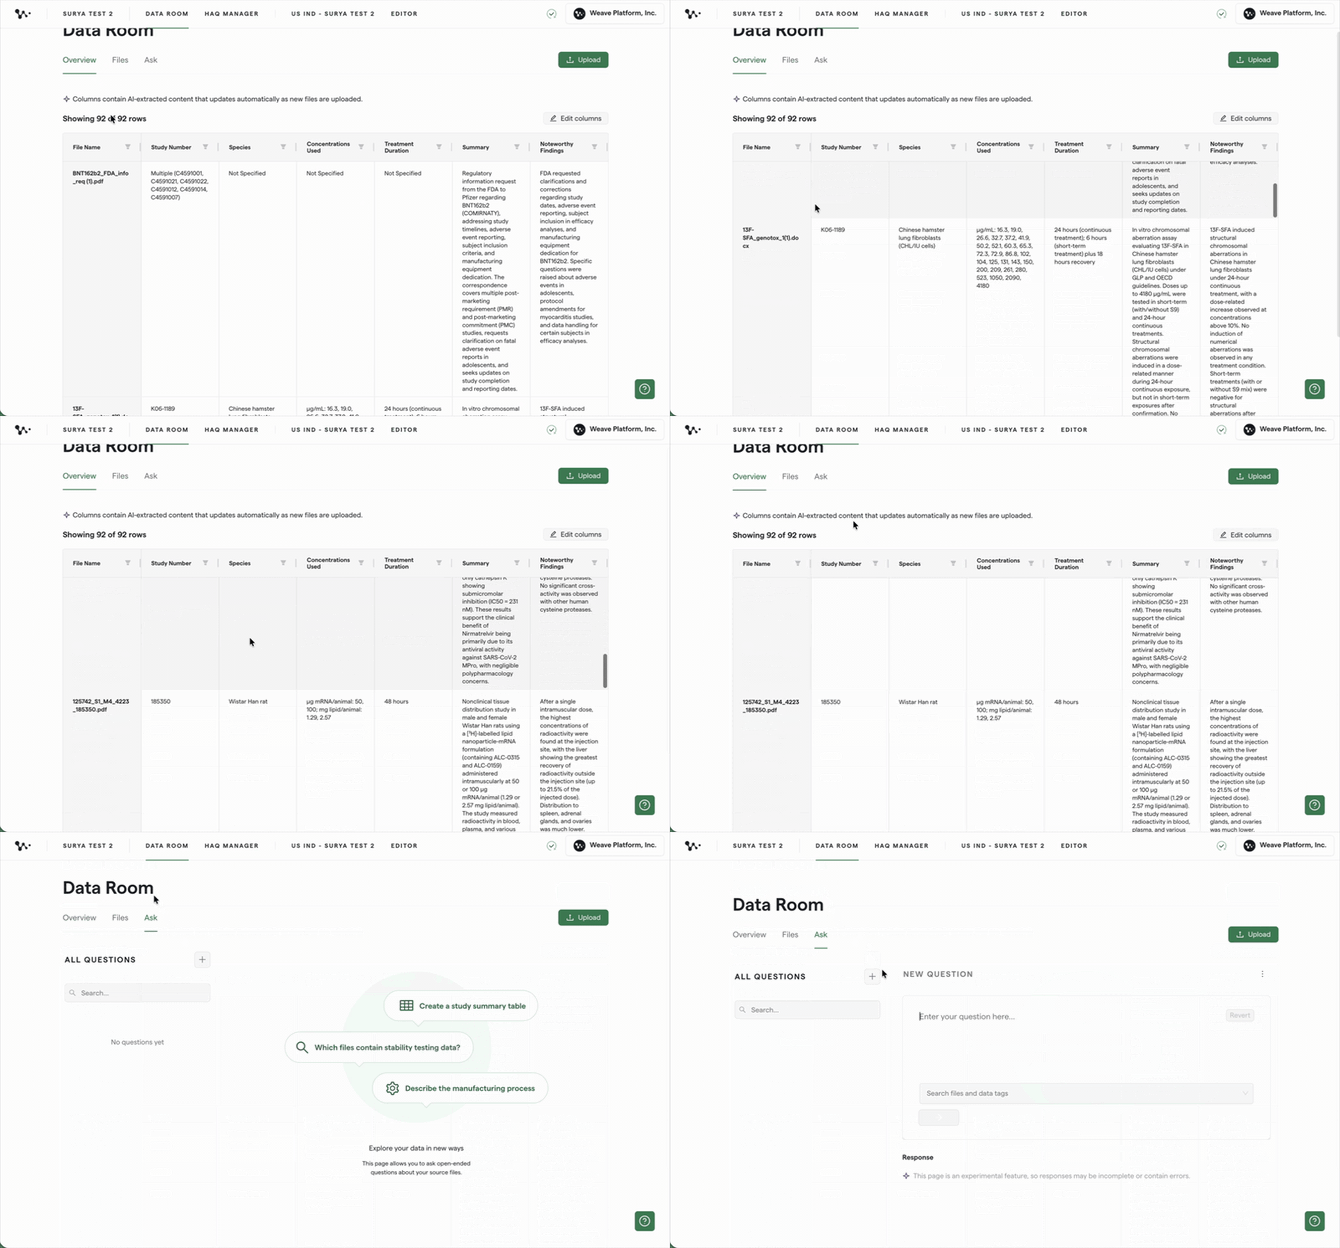
You can customize the data shown here by clicking Edit Data.
Once your files are in the Data Room, the next step is applying data tags so the AI knows which files to use for each document section. See [How To Update Data Tags] for that workflow.
Managing existing files
Updating a file (draft to final)
If you uploaded an interim draft and your final version is now ready, upload the final file to the same location. It's safe to keep both versions in the Data Room. The AI will use any file whose tags match a section's prompt. Remove the old draft's tags if you want to exclude it from future generation.
Deleting a file
To delete a file, click the three dots on the file row and select Delete. Deleting a file removes it from generation. Any content that was generated from it remains in the document but will no longer be traceable to that source.
Important: Be careful deleting files that were used in already-generated content. Once deleted, the source link is broken in the verification layer.
Scoping a document to a specific folder
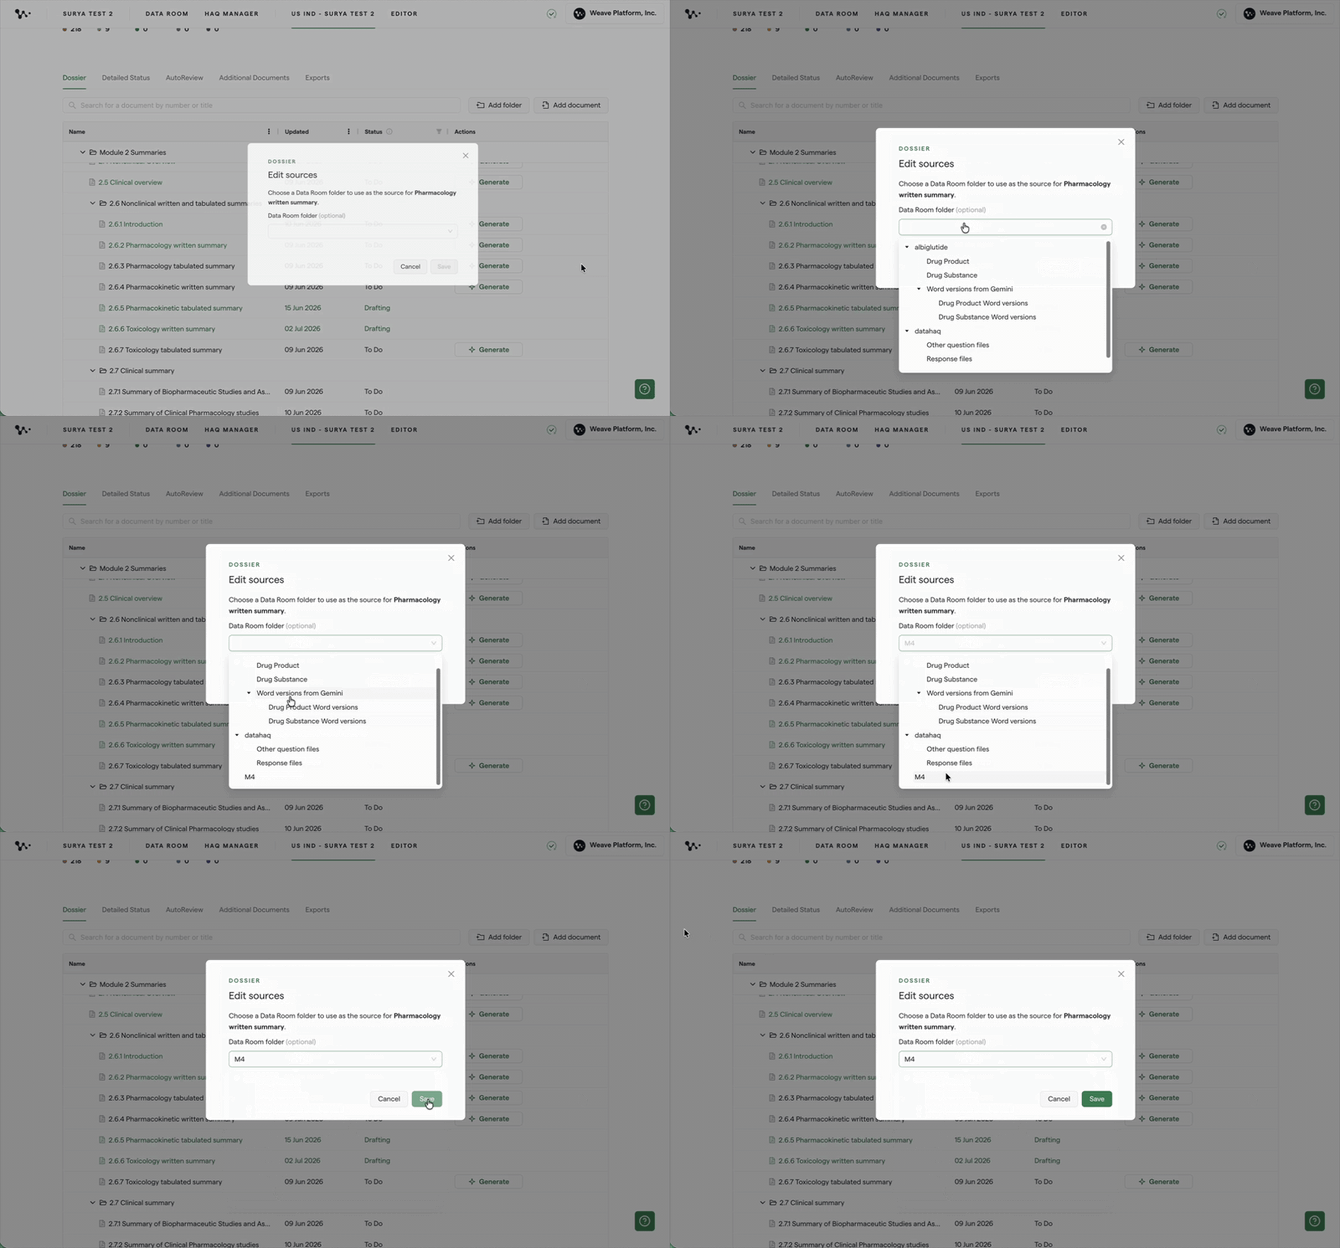
If your Data Room contains source files for multiple documents (for example, an Investigator's Brochure and a Clinical Study Report), you can prevent cross-contamination by scoping each document to its own subfolder.
From the Dossier tab, hover over the document, click the three dots > More Actions > Edit Sources, then select the folder that document should draw from exclusively.
FAQ
Q: What file types does the Data Room support?
A: PDF (digital or scanned), DOCX, RTF, and Excel. Maximum file size is 600 MB per file. PowerPoint is not supported. Convert decks to PDF before uploading.
Q: Do I need to rename my files to a specific convention before uploading?
A: No. File names don't affect how the AI extracts or tags content. Extraction is driven by what's inside the file, not what it's called.
Q: Is it safe to upload an interim draft document?
A: Yes. Uploading an interim draft won't cause any issues. When your final version is ready, upload it alongside the draft, then remove the tags from the draft if you want to stop the AI from referencing it going forward.
Q: Can I upload an entire folder at once?
A: Yes. You can upload entire folders including nested subfolders in one action. The platform preserves your existing folder structure automatically.
Q: A file keeps failing to upload. What should I do?
A: Check whether the file is password-protected or encrypted, as these fail silently. Also check whether the file is corrupted. If none of those apply, try re-saving the file in a supported format and uploading again.
Q: Can I delete files from the Data Room?
A: Yes. Click the three dots on the file row and select Delete. Be aware that deleting a file that was used in prior generation breaks the source traceability link for that content.
Quick Reference: Uploading to the Data Room
- Open your program and click Data Room in the left nav
- Click Upload to browse and add your files
- Click any file and select Preview to confirm it processed correctly
- For diagnostics, click three dots > View Extracted > Show Raw Markdown
- Click Overview to review the program-wide file summary
- To scope a document to a specific folder: Dossier > three dots > More Actions > Edit Sources